Consuming Events Using MSK Connect – S3 Bucket Sink

Part 1 – Objectives, Audience, Tools & Prerequisites
Part 3 – Using JavaScript Client To Produce and Consume Events
Part 4 – AWS Lambda Function To Produce Kafka Events
Part 5 – AWS API Gateway For Accepting Events
Part 6 – Consuming Events Using MSK Connect – S3 Bucket Sink
Part 7 – Consuming Events Using AWS ECS
Part 8 – Storing Consumed Events Into AWS RDS
Introduction
In the previous part, number 5, of this tutorial series we managed to create a REST API endpoint that accepts events and registers them inside our Apache Kafka database.
In the current part, number 6, we are going to consume these events using AWS MSK Connect. MSK Connect is a feature that comes with Apache MSK and allows to stream data to and from our Apache Kafka cluster.
We will learn how we create
- MSK Connectors
- Customized Plugins
- And Logging to CloudWatch logs
Important: If you follow along the steps suggested in this tutorial, you will probably be charged for the resources created in AWS. Make sure that, at the end of the learning experience, you run the necessary actions to destroy these resources, so that you are not charged for any reason. The command that we use, at the end of the process, to destroy the resources we create with this demo, is:
terraform destroyLet’s start
Architectural Objective
We build up on what we have already designed in the previous parts. Here is our architectural objective and what is the new part we are going to add with the current tutorial.
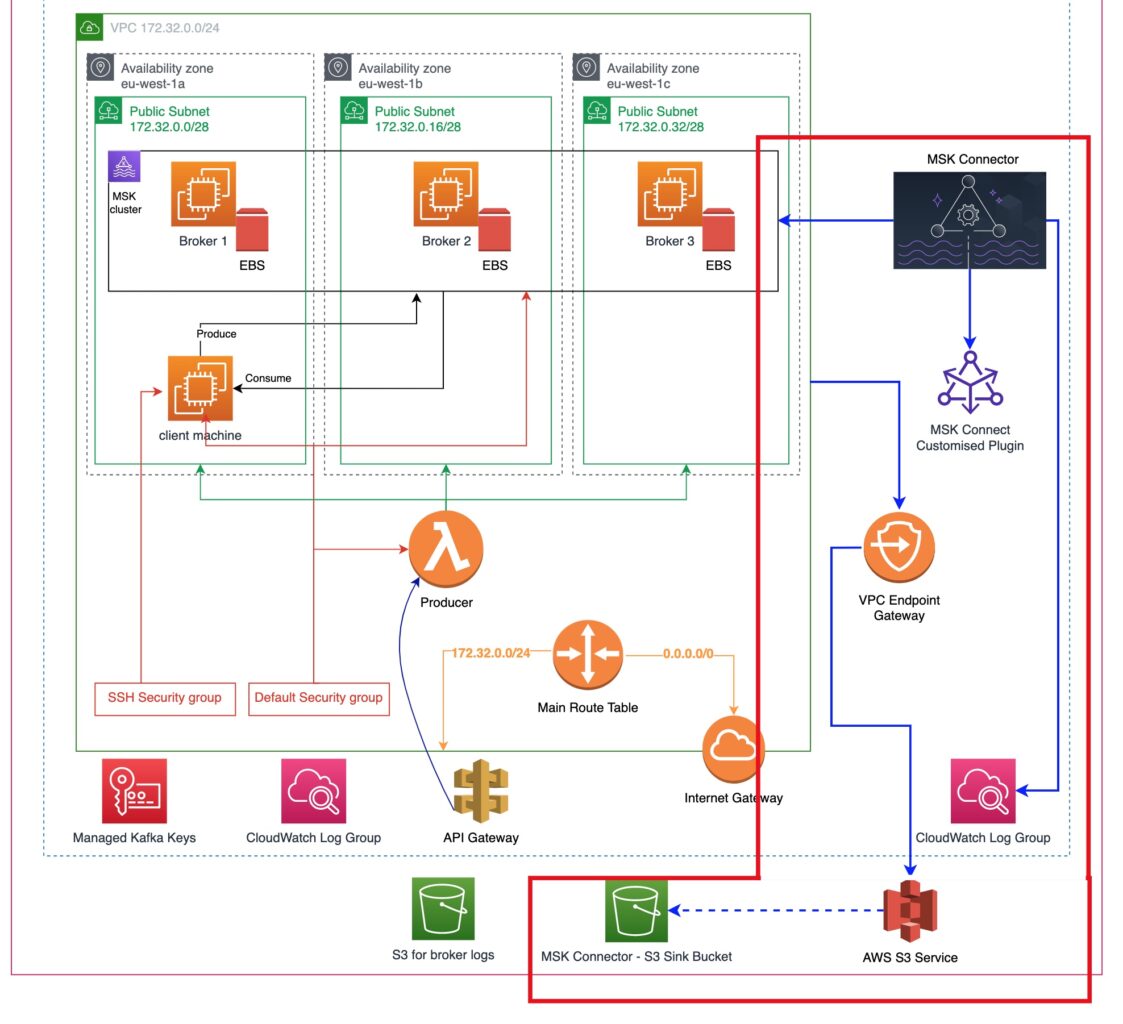
The most important new stuff is:
- A VPC Endpoint Gateway. This will allow us to data transfer between our VPC, where the MSK cluster resides in, and anything that the AWS S3 Service has access to, i.e. to an S3 bucket.
- The is going to be a new S3 bucket which will function as an MSK Connector Sink. The sink is an element that receives data from an MSK Connector.
- The MSK Connector will be fetching data, as a consumer, from the MSK cluster and will be pushing them into the S3 sink bucket via the VPC endpoint.
- At the same time, the MSK Connector will be writing logs into a new CloudWatch log group.
Terraform Files
We continue describing our infrastructure using Terraform. In this part, number 6, of the tutorial series, we are going to add a new Terraform file called msk_connect.tf.
This is the full list of Terraform files in our working directory:
- From Part 2:
client_machine.tflocals.tfmain.tfterraform.tfvarsvariables.tf
- From Part 4:
live_listening_event_producer_lambda_ecr.tflive_listening_event_producer_lambda_func.tfnull_resources.tfglobal_data.tf
- From Part 5:
aws_api_gateway.tf
- From Part 6 (current Part):
msk_connect.tf
The full code of the file msk_connect.tf is given below:
This is quite a big file. We are going to explain its contents part-by-part.
S3 Sink Bucket
This is the S3 bucket that will be receiving the output of the MSK Connector processing. In other words, when a new event is published in our Kafka cluster, the MSK Connector will process it and will create a new file inside this bucket. The file contents will depend on the payload of the event published. The actual folder the file will be created in depends on the MSK Connector implementation. In our case it will be a structured folder path that will include the topic name and the partition the event was published in. We will go into more details about it later on when we will do the demo.
Other than that, the Terraform configuration to create an S3 bucket is done with the resource block aws_s3_bucket. We have used that before in Part 2 of the tutorial series. We don’t forget to make it destroyable (so that the terraform destroy succeeds in removing it completely) and attach the necessary tags as a best practice.
IAM Policy To Allow Access to S3 Sink Bucket
In order for an entity to be able to access an S3 bucket that entity needs to be able to assume the correct IAM Role. The IAM Role, in order to be correct, it needs to be attached to the correct IAM Policy. It is the IAM Policy that describes the rules of access to the S3 bucket.
As you can see from the code snippet above, we have 2 Allow statements. One that allows the entity to list all the buckets and one that allows actions on the S3 bucket that we have created earlier.
We don’t forget to attach the tags as a best practice.
IAM Role and Attachment
As we said earlier, the IAM Policy needs to be attached to the correct IAM Role. It is the IAM Role that an entity will use and acquire the privileges of the IAM Policy.
The above code snippet using the aws_iam_role to define the correct IAM Role. See how the assume_role_policy registers the kafkaconnect.amazonaws.com as the entity that can be trusted, i.e. the entity that can assume this role.
Then, withe resource aws_iam_role_policy_attachment we attach the IAM Policy to the IAM Role. This means that the MSK Connect service can now write to the S3 bucket specified by the IAM Policy.
VPC Endpoint
We create a Gateway type VPC endpoint. This construct associates an AWS service with one or more Route Tables of a VPC. Creating this association it allows data to flow from the VPC to the AWS service and vice-versa.
In our case, we link the S3 service (see the service_name attribute value) with the VPC we have our MSK cluster in. Also, we link it to the main Route Table of this VPC.
Having done so, it will allow the MSK Connector to access the MSK Cluster and put data into the S3 bucket.
MSK Connect Customized Plugin Code
The customized plugin code, we will use an implementation that has already been developed by Confluent. The code is packaged into a zip file.
Download the file and save it in your local machine. The download can be done from the address here (page: Confluent – Amazon S3 Sink Connector).
We have downloaded the file confluentinc-kafka-connect-s3-10.3.0.zip into our ~/Downloads folder.
We enhance the locals.tf file (the file that we store Terraform local variables that can be used across the whole project) to refer to the downloaded file as follows:
We can then use these locals in an aws_s3_object Terraform resource and allow Terraform to upload the .zip file to the S3 bucket that we have created for MSK Connect.
Again, the aws_s3_object uploads the file specified by source into the S3 bucket specified by bucket and assigns to the upload file the name specified by the key value.
MSK Connect Customized Plugin
With the MSK Connect Customized Plugin Code uploaded to S3, then we can create the MSK Connect Customized Plugin itself:
Defining the resource for an MSK Customized plugin that is stored in a S3 bucket in ZIP format is quite easy. The resource that we use is the aws_mskconnect_custom_plugin and we specify the content_type as ZIP and the location as an s3 specification with the bucket_arn and the file_key.
CloudWatch Log Group
Then we move to the creation of a new CloudWatch Log Group that will be used by the MSK Connector to log information about what it does as well as any possible errors.
MSK Connector
This is the main block that creates the MSK Connector.
We start with the name and the version of the MSK Connect API that our connector will support.
Then we specify the connector plugin location and version (lines 6 – 11). Remember that we have uploaded the plugin code into the S3 bucket.
Then we specify which Apache Kafka cluster our connector is going to get data from. These are the lines 13 to 21. We don’t only specify the bootstrap_servers, but we also give the details of the vpc, i.e. the security_groups and the subnets.
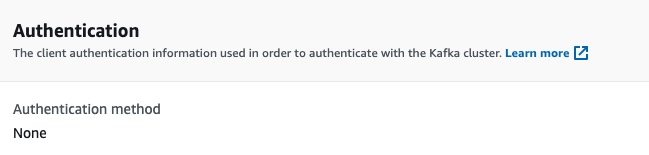
Then we specify the client authentication. We will not use any, that’s why we pass the value NONE.
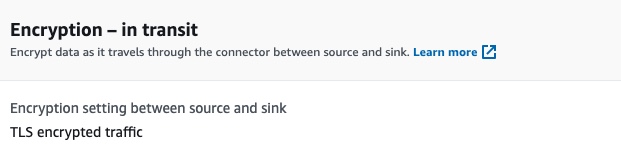
Then we specify the encryption of data while in transit. We specify the value TLS, since our Apache Kafka supports it.
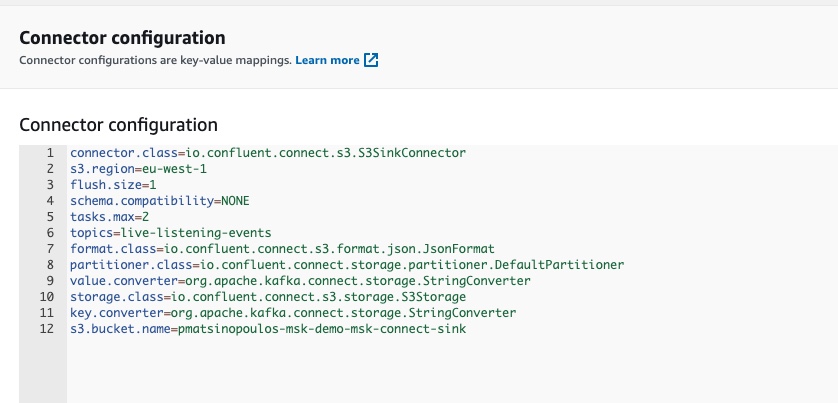
Then, the block connector_configuration is a map of keys to values. We have taken this configuration from the Amazon MSK Connect documentation page about Connectors, here. Note how we use the Terraform variables to refer to the topic name and the region. Note also how we refer to the S3 bucket that the connector will use to put data in.
Then, on line 46, we set the MSK Connector execution role (with the service_execution_role_arn attribute). The value we set there is the value of the IAM Role that we have created and that will allow the connector to write to the destination S3 bucket.
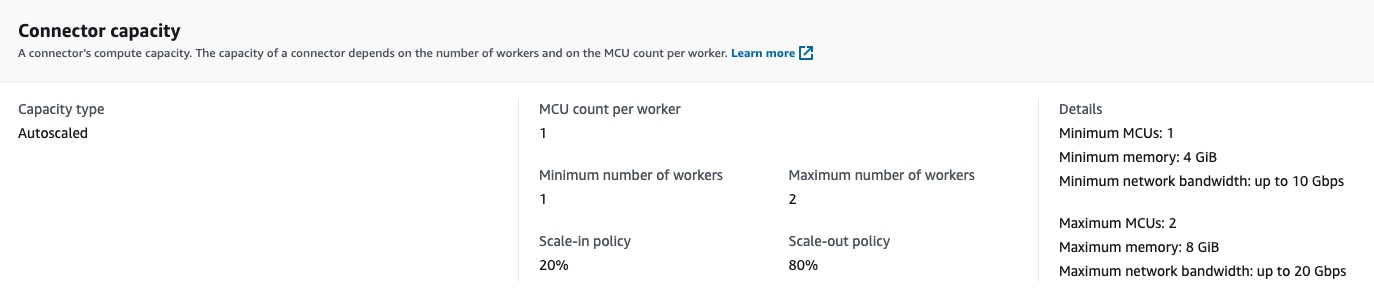
Then, in between line 48 and 62, we specify the capacity of the connector. We specify that we want to use autoscaling. The autoscaling has its own configuration such as the minimum number of workers, the maximum number of workers and the thresholds that will trigger scale-up or scale-in.
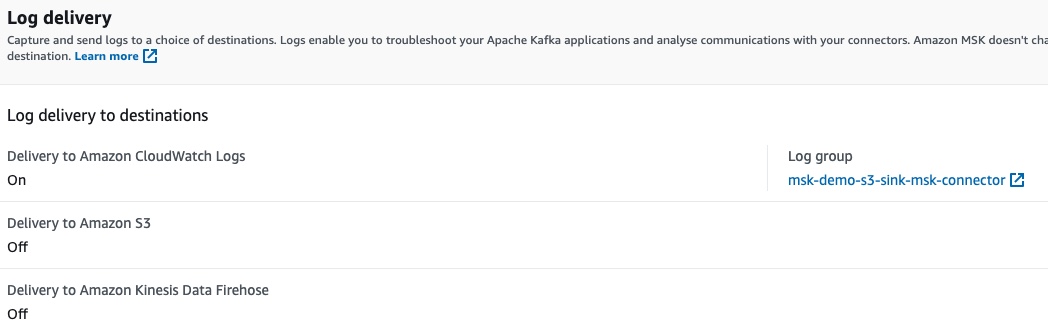
Finally, we configure the logging delivery (lines 64 – 71). The logs will be delivered to the new CloudWatch Log Group that we have created.
Terraform Apply
We have everything ready in our IaC / Terraform files. It is about time to ask Terraform to create all these resources for us.
Important: Make sure that that you have Docker server running locally.
The command is:
$ terraform applyThis will present the plan of creating 39 resources (if our Terraform state is clean when we do) and then we respond with yes to fire the creation process.
It will take a lot of time to build the infrastructure due to the AWS MSK cluster which takes from 30 to 90 minutes to be built. So, we have to be patient. At the end of a successful built process we will see the message:
Apply complete! Resources: 39 added, 0 changed, 0 destroyed.Double-Check Application Results
We already know how to check the resources of the infrastructure, like the AWS MSK cluster and all the other resources we learnt about in the previous parts of the tutorial. Let’s check that the resources of this part have been successfully created.
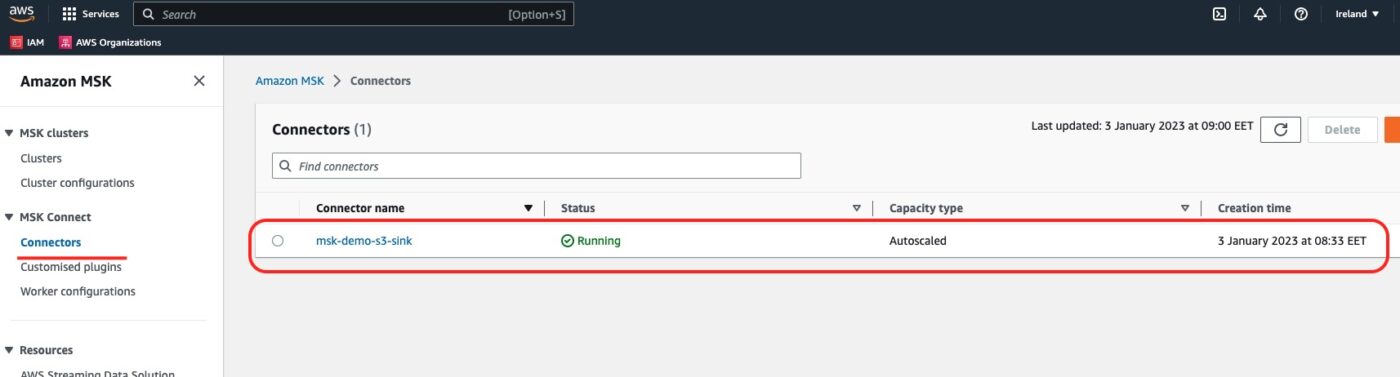
We can visit the AWS MSK service dashboard and select Connectors from the left side menu. This is where we will see our newly created MSK Connect Connector:
If we click onto the connector link, we will go into its details. This is a long page that includes all the pieces of information about the connector. What we are looking at is compatible to what we have configured within our Terraform file.
For example, we can see the configuration map:
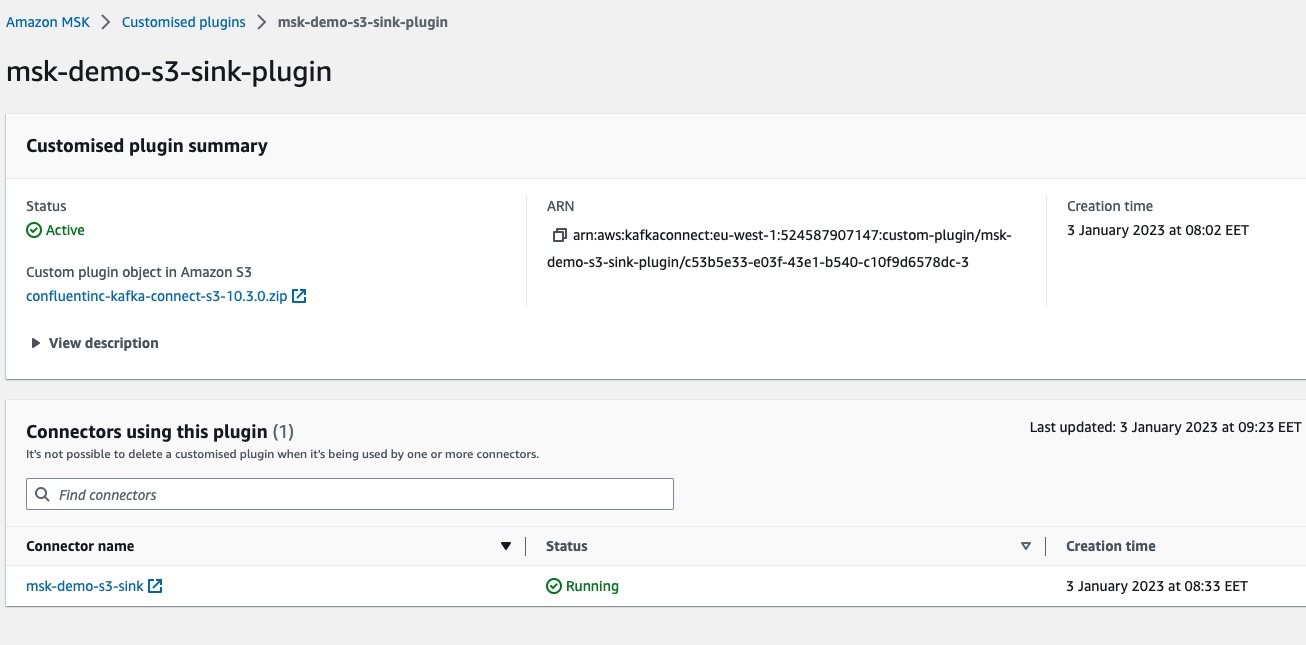
or the Customized Plugin reference:

The reference to the Kafka cluster:

The autoscaling configuration:
The execution role reference:

The authentication:
The encryption of data while in transit
The log delivery configuration and the reference to the specific CloudWatch log group:
All these blocks have links to the dependent resources. We can click to navigate to them. For example, clicking on the name of the custom plugin, msk-demo-s3-sink-plugin, we can go to the details of the custom MSK connect plugin:
Test The Implementation
With everything created successfully, let’s put our hands on the keyboard to test the implementation. The steps to test are the following:
Send an Event via the REST API
We are now ready to send an event. We will use the curl command and our API Gateway Endpoint.
This command, we can send it from our local machine. We don’t have to send it from within the EC2 client machine.
$ curl -v -X POST 'https://98frg4tbsj.execute-api.eu-west-1.amazonaws.com/v1/events' -H 'Accept: application/json' -H 'Content-Type: application/json' -d '{"broadcastId": "123"}'At the end of this curl command, we will see the 200 response status code confirming the successful execution.
Confirm Entry in the S3 Sink Bucket
If everything has worked successfully with our MSK Connector, then we should be able to see a new entry inside the S3 sink bucket. Let’s visit the S3 dashboard for the particular bucket:
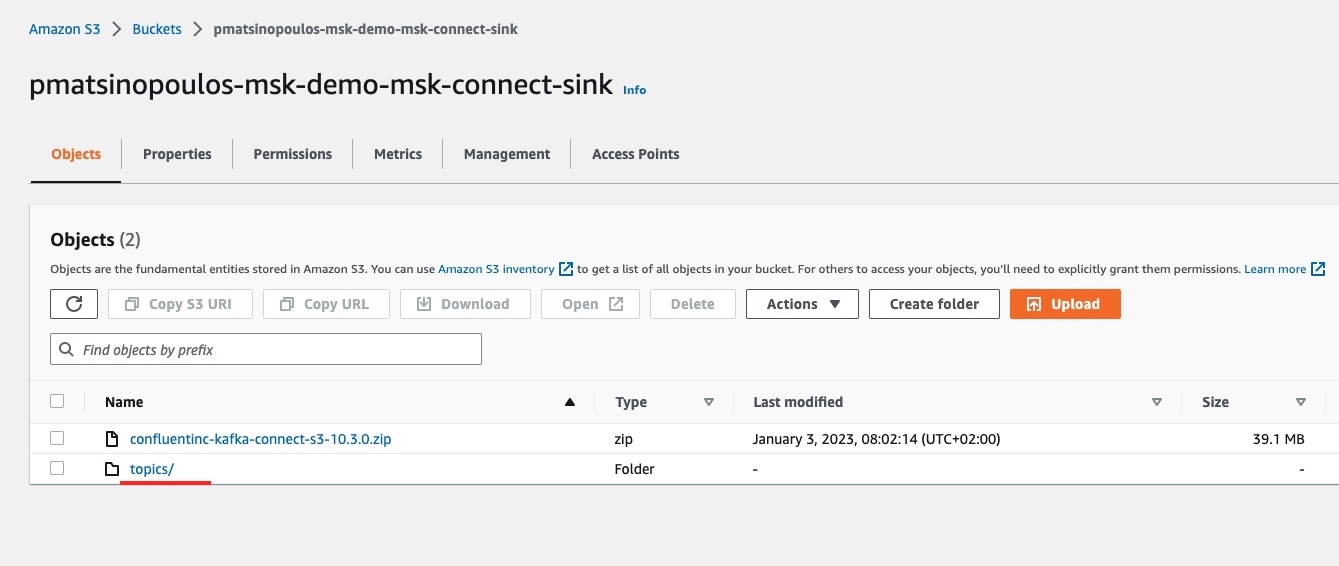
We can see, next to the zip package of the customized plugin of our connector, the folder topics/. This has been created automatically when we sent the first event.
If we click to see the contents of this folder we will see the another sub-folder:
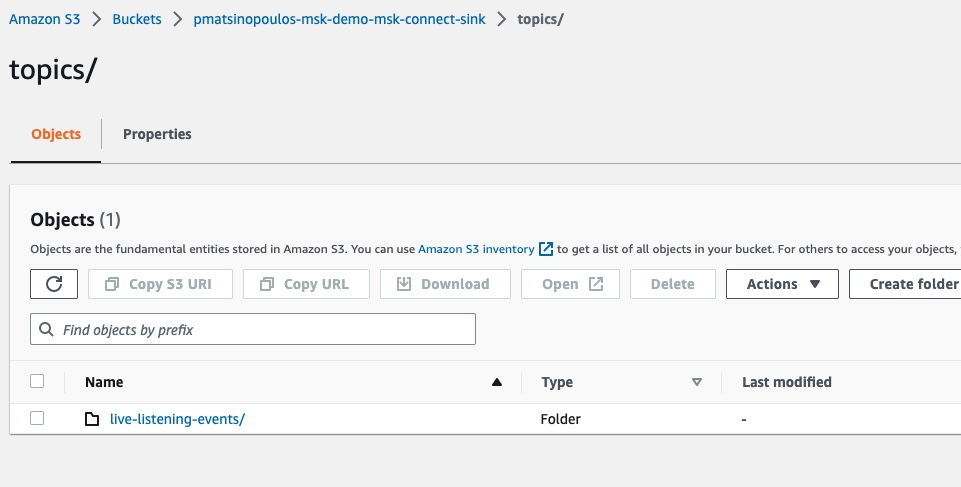
This is the live-listening-events folder which matches the name of the topic we published the event into.
If we click to go inside this folder:
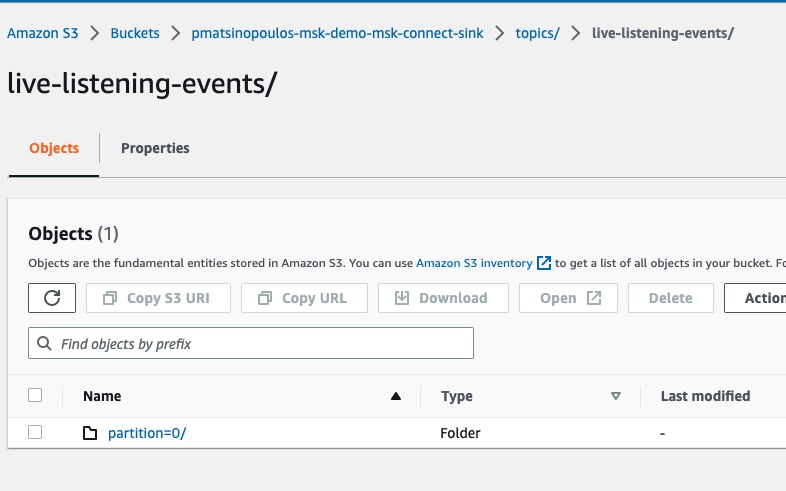
We will see another sub-folder which is the one specific to the partition the event was registered into.
If we click to go inside the partition folder:
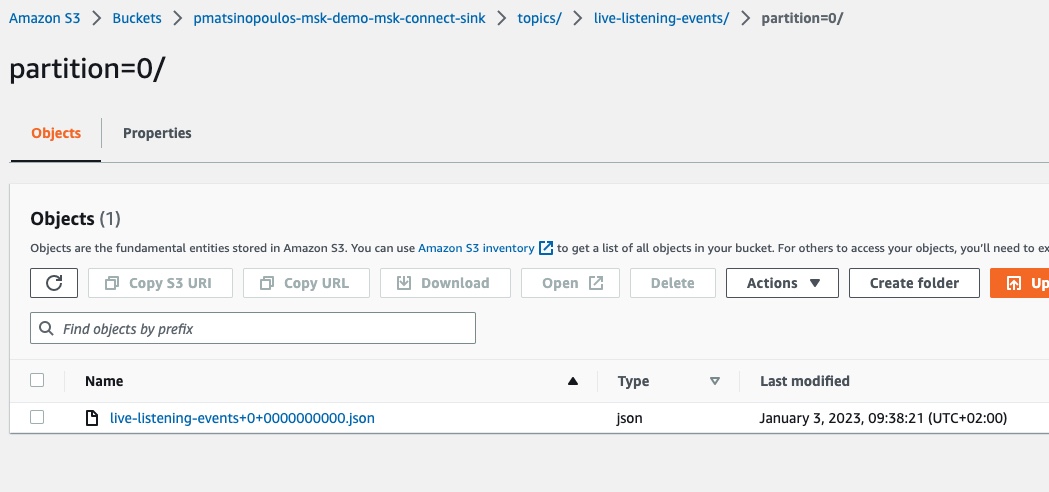
We will see the JSON file that has been created as a result of our MSK connector processing the event published into our Kafka cluster. If we download this file and inspect its contents we will see this:
"This is event for broadcast: 123"which is the payload of the event as it is published into the Kafka cluster by our lambda Producer.
If we try another curl call:
$ curl -v -X POST 'https://98frg4tbsj.execute-api.eu-west-1.amazonaws.com/v1/events' -H 'Accept: application/json' -H 'Content-Type: application/json' -d '{"broadcastId": "456"}'and refresh the contents of the partition folder in the S3 sink bucket, we will see the new file having been created:

If you download and inspect the contents of the new file, live-listening-events+0+0000000001.json, you will see:
"This is event for broadcast: 456"Excellent! Everything seems to be working as expected.
Destroy To Avoid Further AWS Costs
To avoid being charged more than you want, make sure that you call Terraform to destroy all the 39 resources that we have created for this part of the tutorial:
$ terraform destroyClosing Note
That is the end of Part 6 of the tutorial series Practical Terraform & AWS. We will continue with the seventh Part, in which we will develop our Kafka Consumer using Docker and we deploy it to AWS ECS using Fargate launch type.
Contact Me
If you want to contact me to ask questions and provide feedback and comments, you are more than welcome to do it. My name is Panos and my email is panos@mixlr.com.